

Who said charcuterie has to be an appetizer? Enter: Dessert Charcuterie Board. A perfect balance of sweet and salty snacks great for a movie night, Valentine’s Day, a shower, or just for grazing!

About this Board
Who doesn’t love a good charcuterie board?! I’m a major fan of these fun snack spreads and this Dessert Charcuterie Board might just be my new favorite. It doesn’t get much better than dark chocolate, graham crackers, meats and cheeses, and more; there’s just so much for the tastebuds!
What’s great about this charcuterie dessert board is that it combines sweet with salty and makes for the perfect addition to a night in; whether that’s with your best pals, a bachelor night, or something like Valentine’s Day! Get creative and make a board for the ultimate snacking experience.
And if you’re looking for more sweet snacks (that maybe could even end up on your Dessert Charcuterie Board!), also check out these Raspberry Rice Krispie Treats, this Chocolate Pretzel Bark, or these Chocolate Peanut Butter Truffles that I know you’ll enjoy, too!
Recipe Ingredients
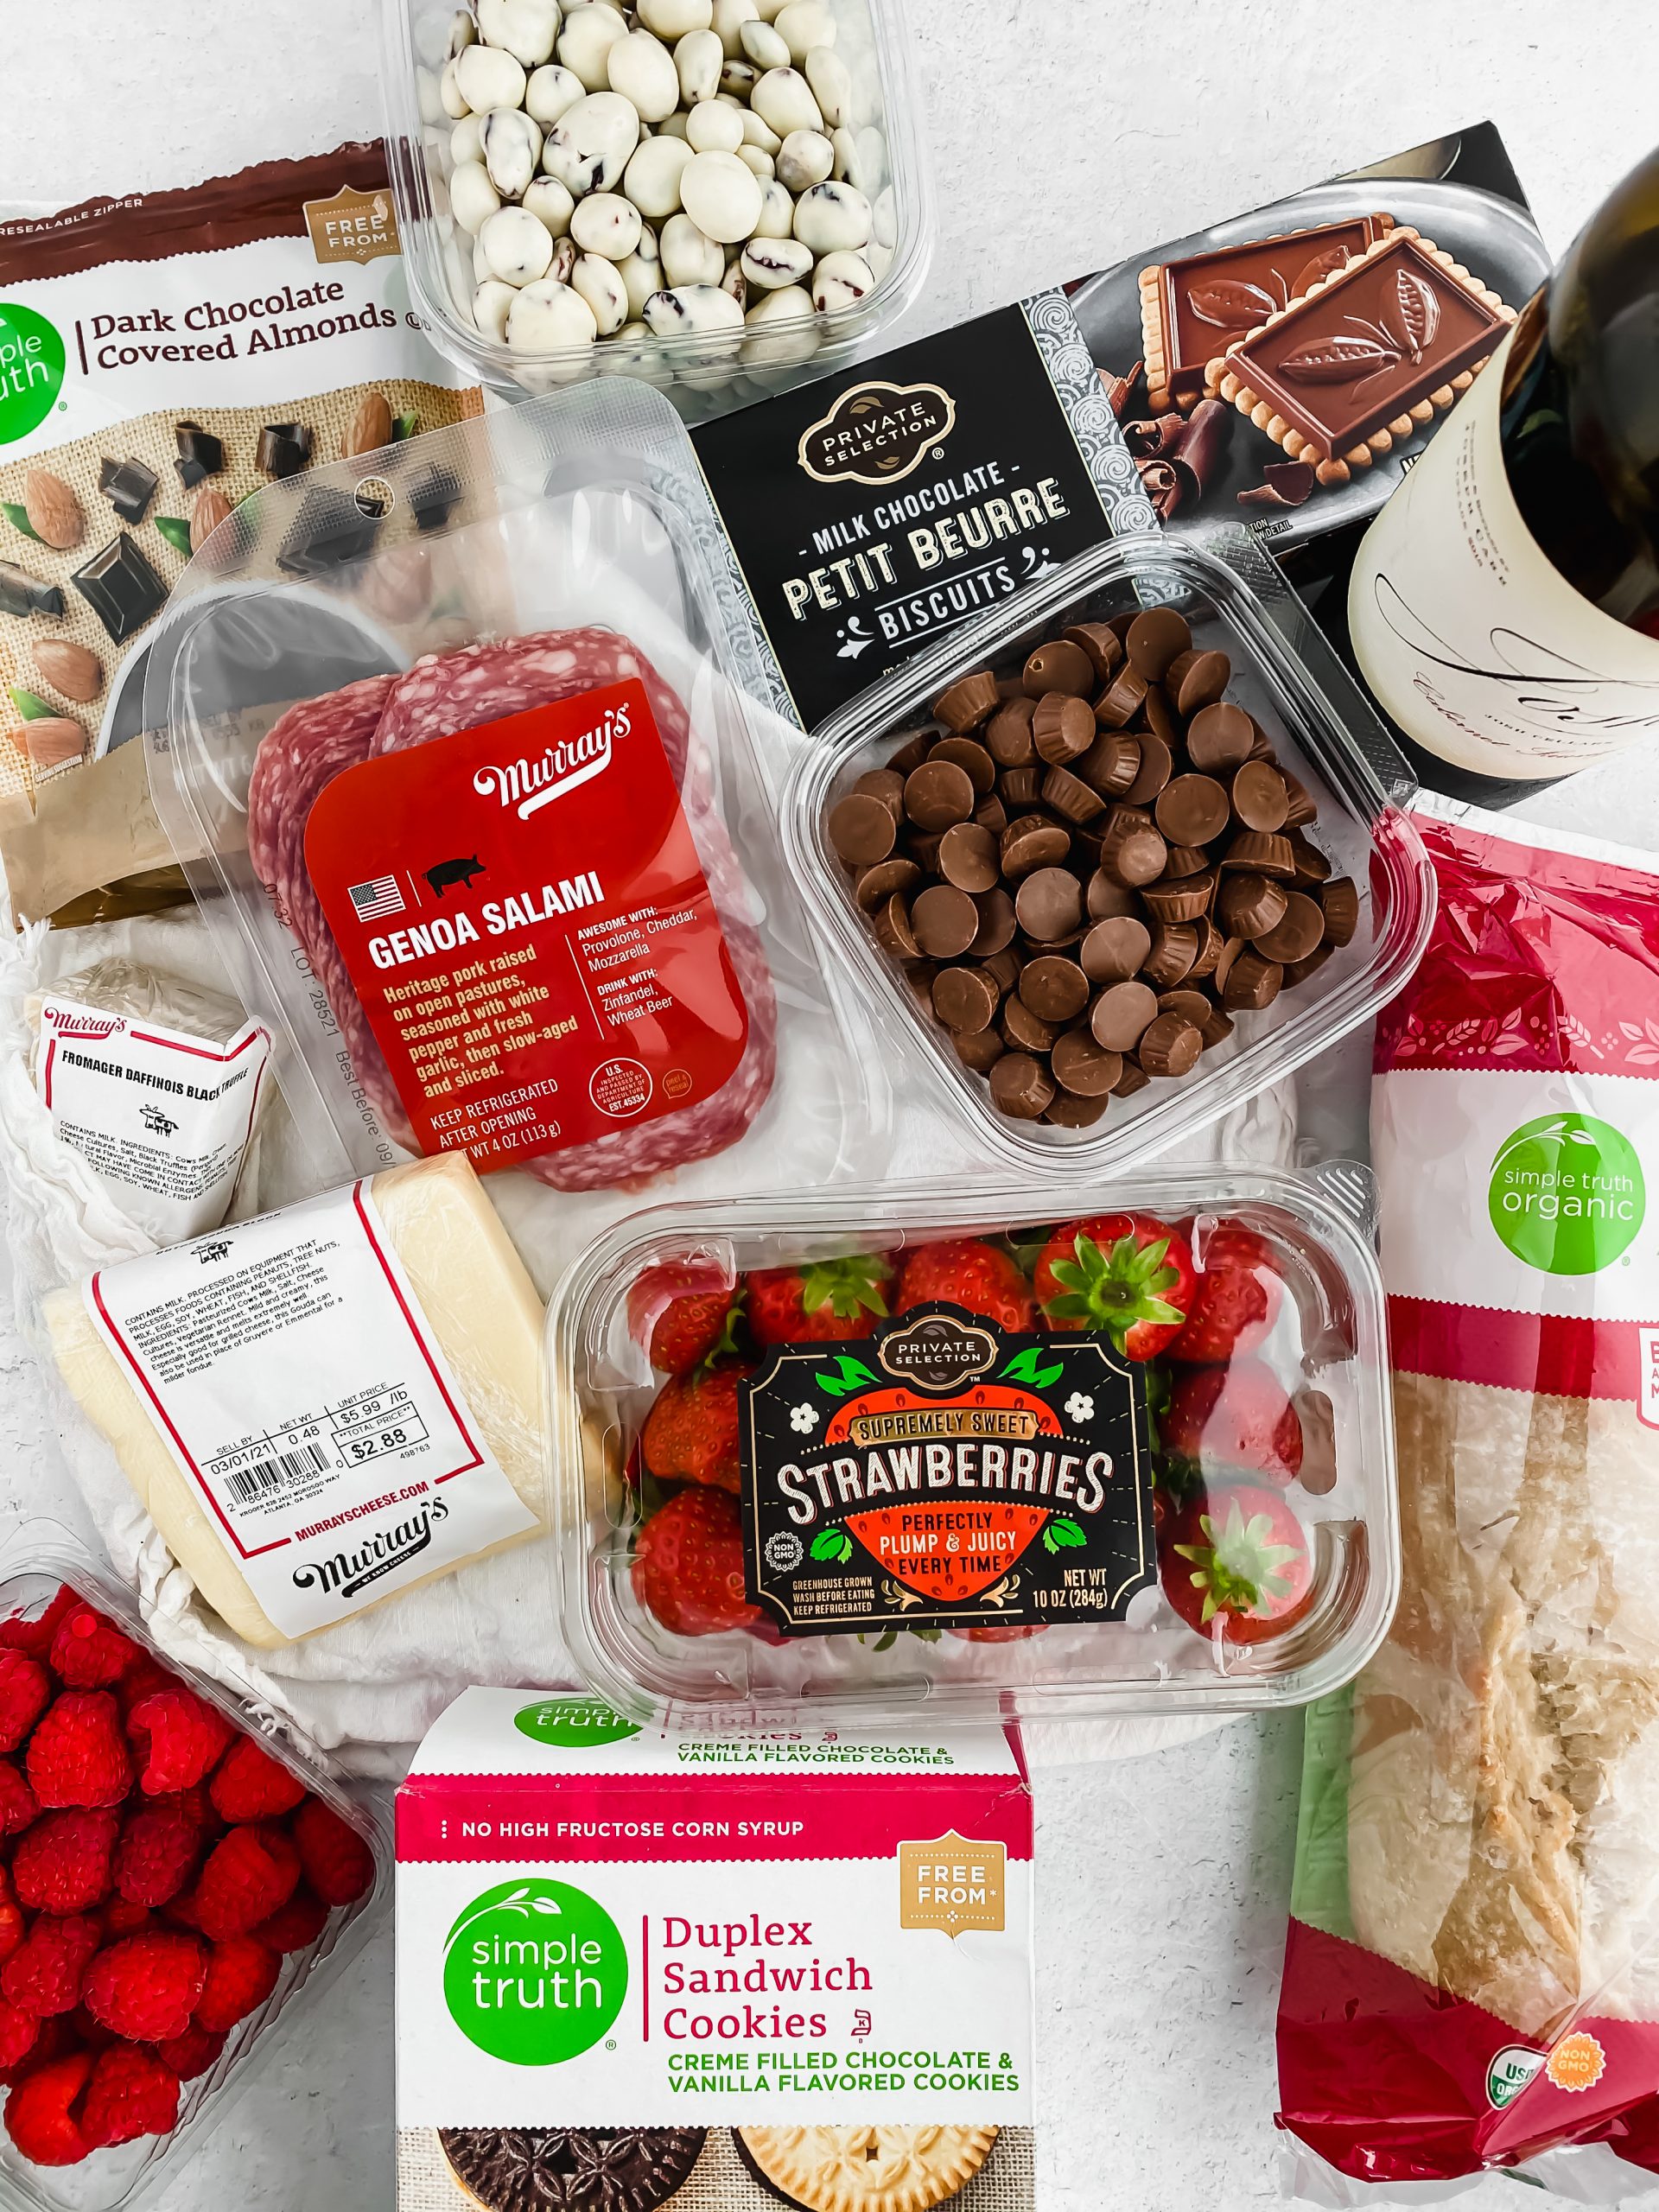
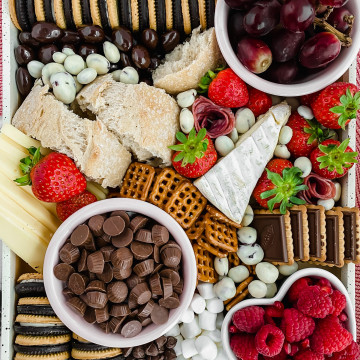
- Fruit – I suggest using 3-4 different fruits for a variety of colors and shapes. My favorites are red grapes, raspberries, and strawberries for their vibrant colors but pineapple, blueberries, or even apple slices would work too!
- Cheese – A variety of 2-3 cheeses is also ideal, I usually get mine at the Kroger or Whole Foods cheese bar. That way you can get smaller cuts at $5 or so for different types of cheese as a “buy it and try it” versus spending $20 on aged bleu cheese that you end up not liking :/
- Sweet Snacks – This is the real fun part, the sweets! I usually get 6-8 different options for a variety of flavors, textures, and shapes. These could be Oreos, marshmallows, chocolate covered almonds, graham crackers, yogurt covered cranberries, chocolate chips, peanut butter cups, and so forth.
- Extras – If you want some more savory/salty action on the board, try a few of these suggestions out: salami, fresh baguette, meat sticks, pretzels, and so forth.
See the recipe card below for a full list of ingredients and measurements.
Substitutions and Variations
Get creative with your charcuterie dessert board and make it your own. The components I included are listed above, but don’t stop there.
You can use up ingredients/foods that you have already, you can buy fresh and intentional foods, or you can do a mix of each for this! Whether you’re enjoying this charcuterie board solo or with others, just have fun with it and customize it for the tastebuds.
- Fruit can be anything you’d like honestly. Berries are always a good idea but you could also do banana slices, peach, cherries, mango, kiwi, orange slices, peach, or whatever is in season or on sale at the store.
- Add a creamy spread to dip things in or spread with like cream cheese, frosting, or even a dessert hummus.
- Cookies like Oreos, Girl Scout Cookies, Graham crackers or a healthier brand like Simple Mills cookies, especially if you need to keep this gluten free!
- For more crunch you could add pretzels, roasted and salted cashews, ritz crackers, potato chips, or even these savory crisp breads.
- Small bites like mini marshmallows, candies, chocolate chips, yogurt covered cranberries, or peanut butter cups are great for adding a touch of extra sweetness.
- If you want extra salty flavor to pair with the sweet and savory on the board, try adding a meat! This could be salami, bacon, or even meat sticks
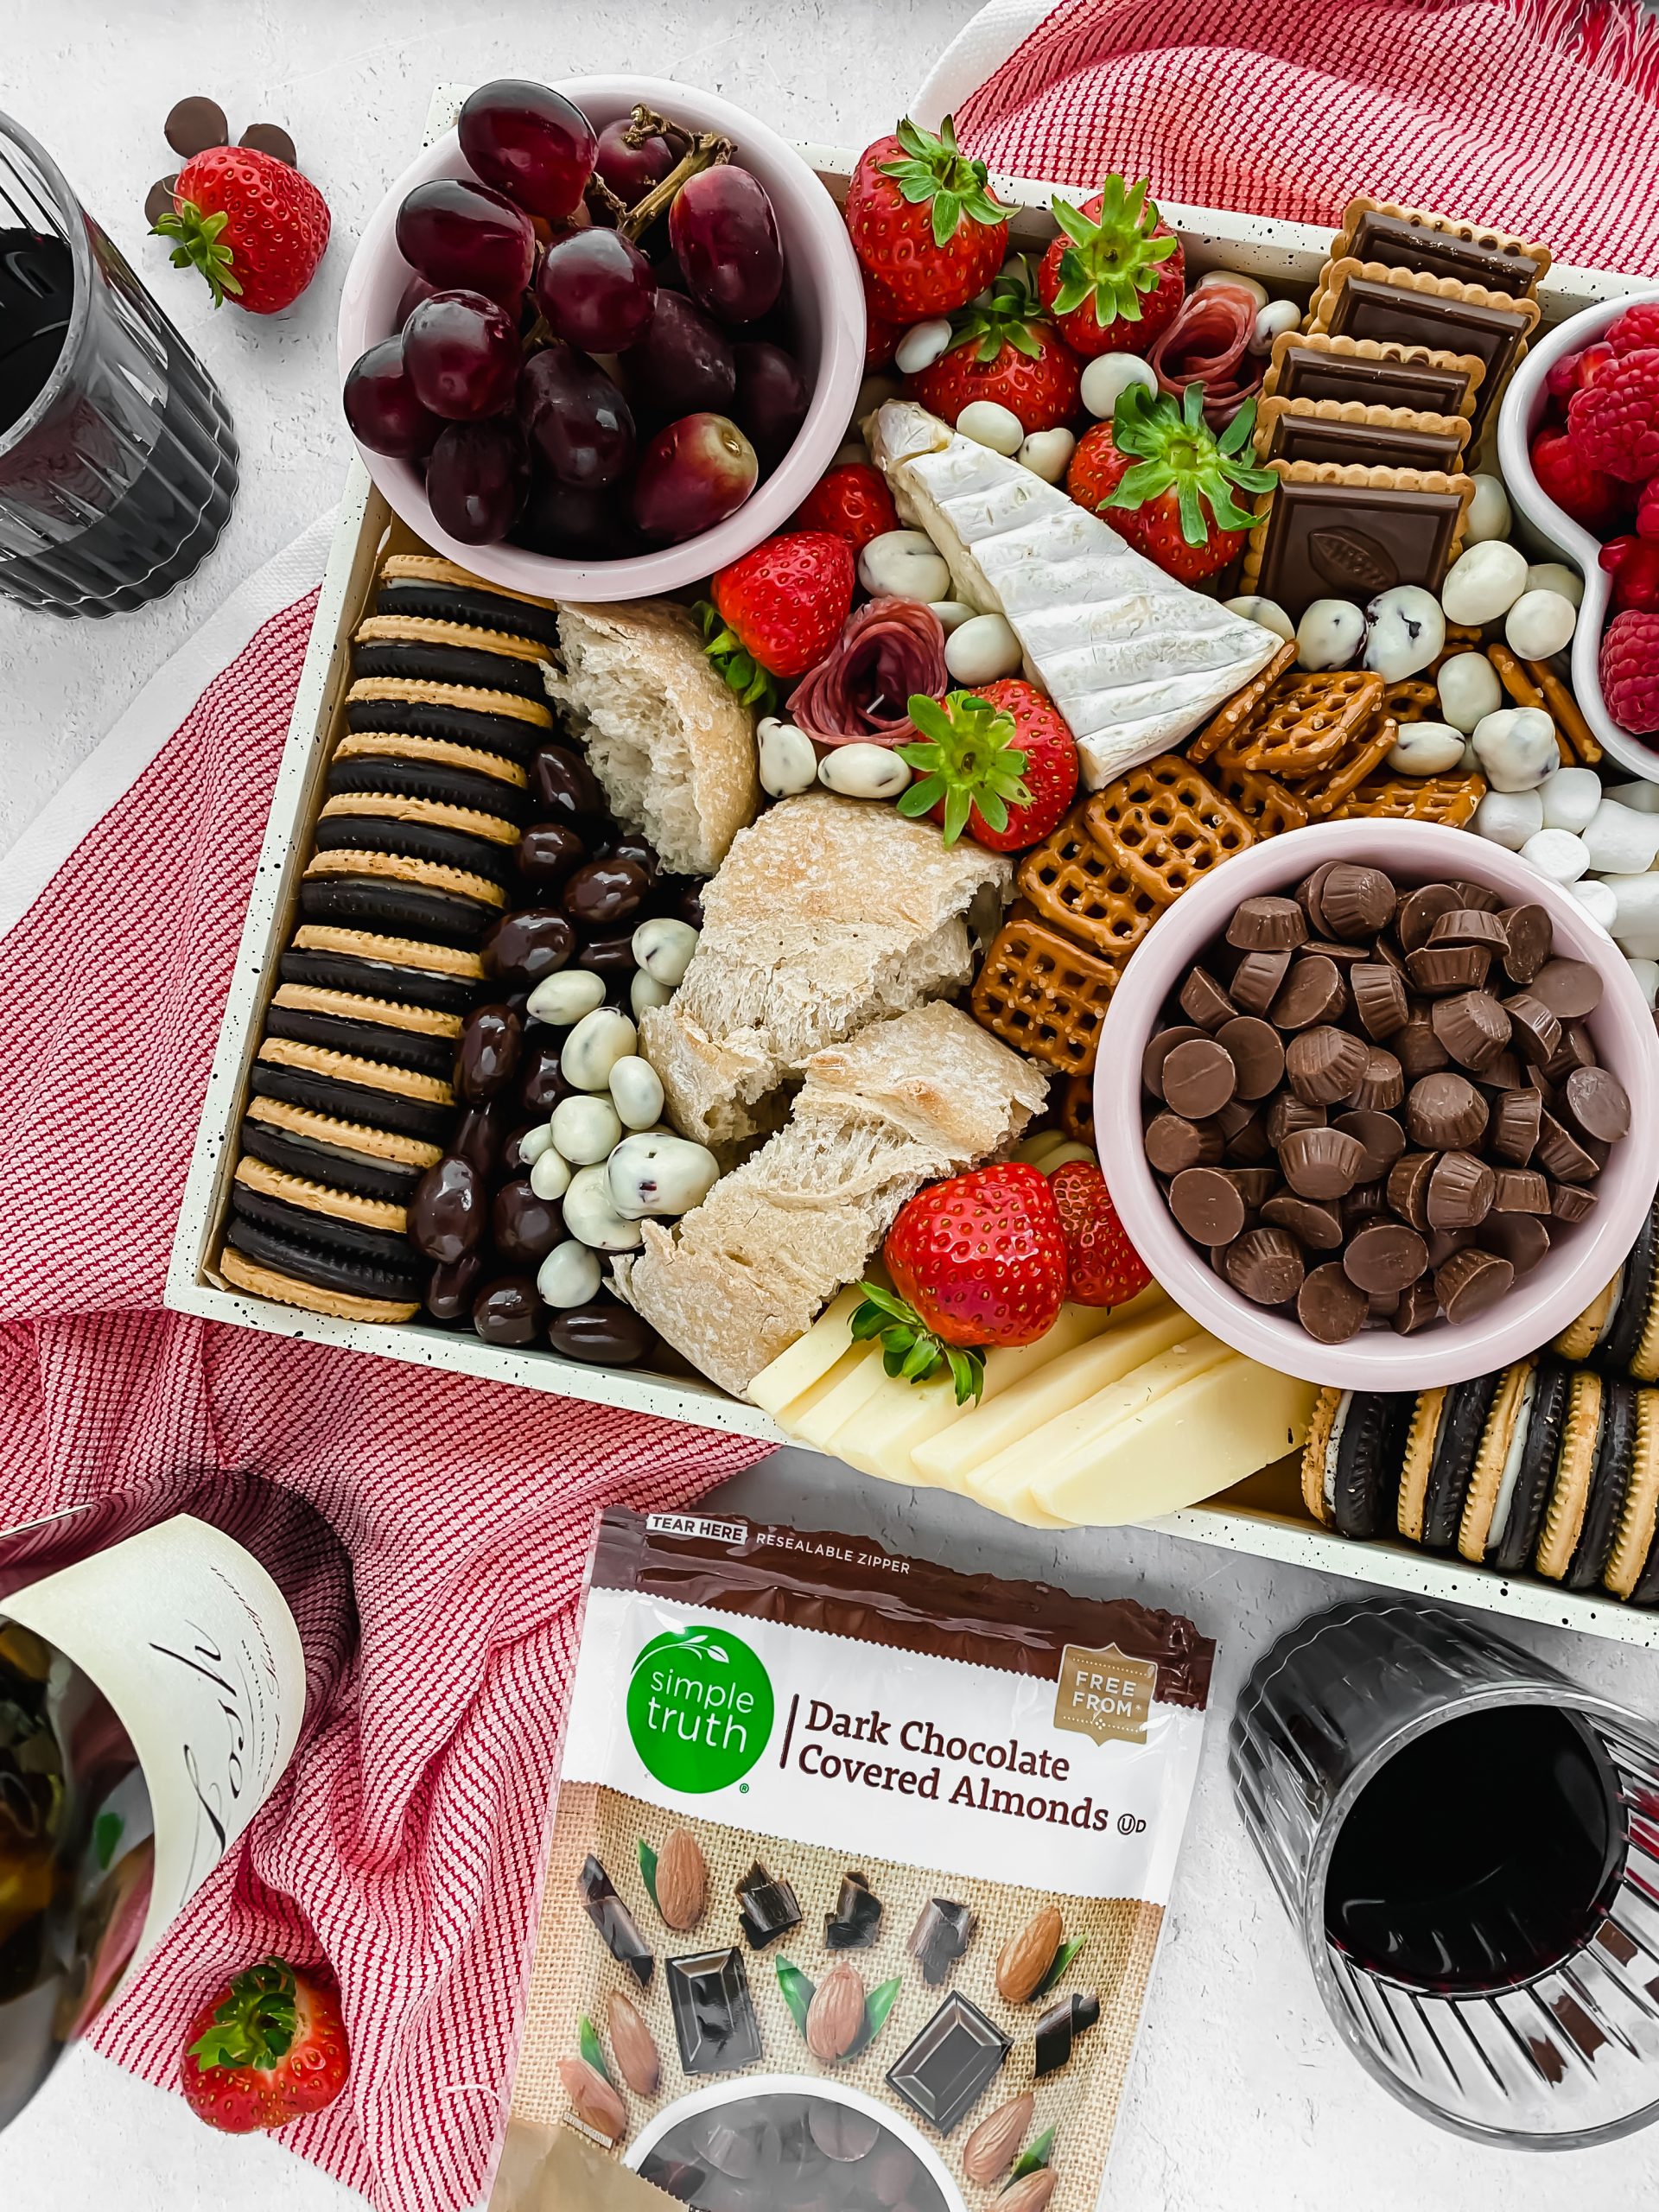
How to Make This Board
My favorite part of making a charcuterie board is that there’s no one way to do it! It’s all about building the board in your own way and getting creative with it. I like to think of charcuterie boards as an edible form of art almost! They’re always so fun to build, photograph, and then enjoy (solo) or with friends or loved ones.
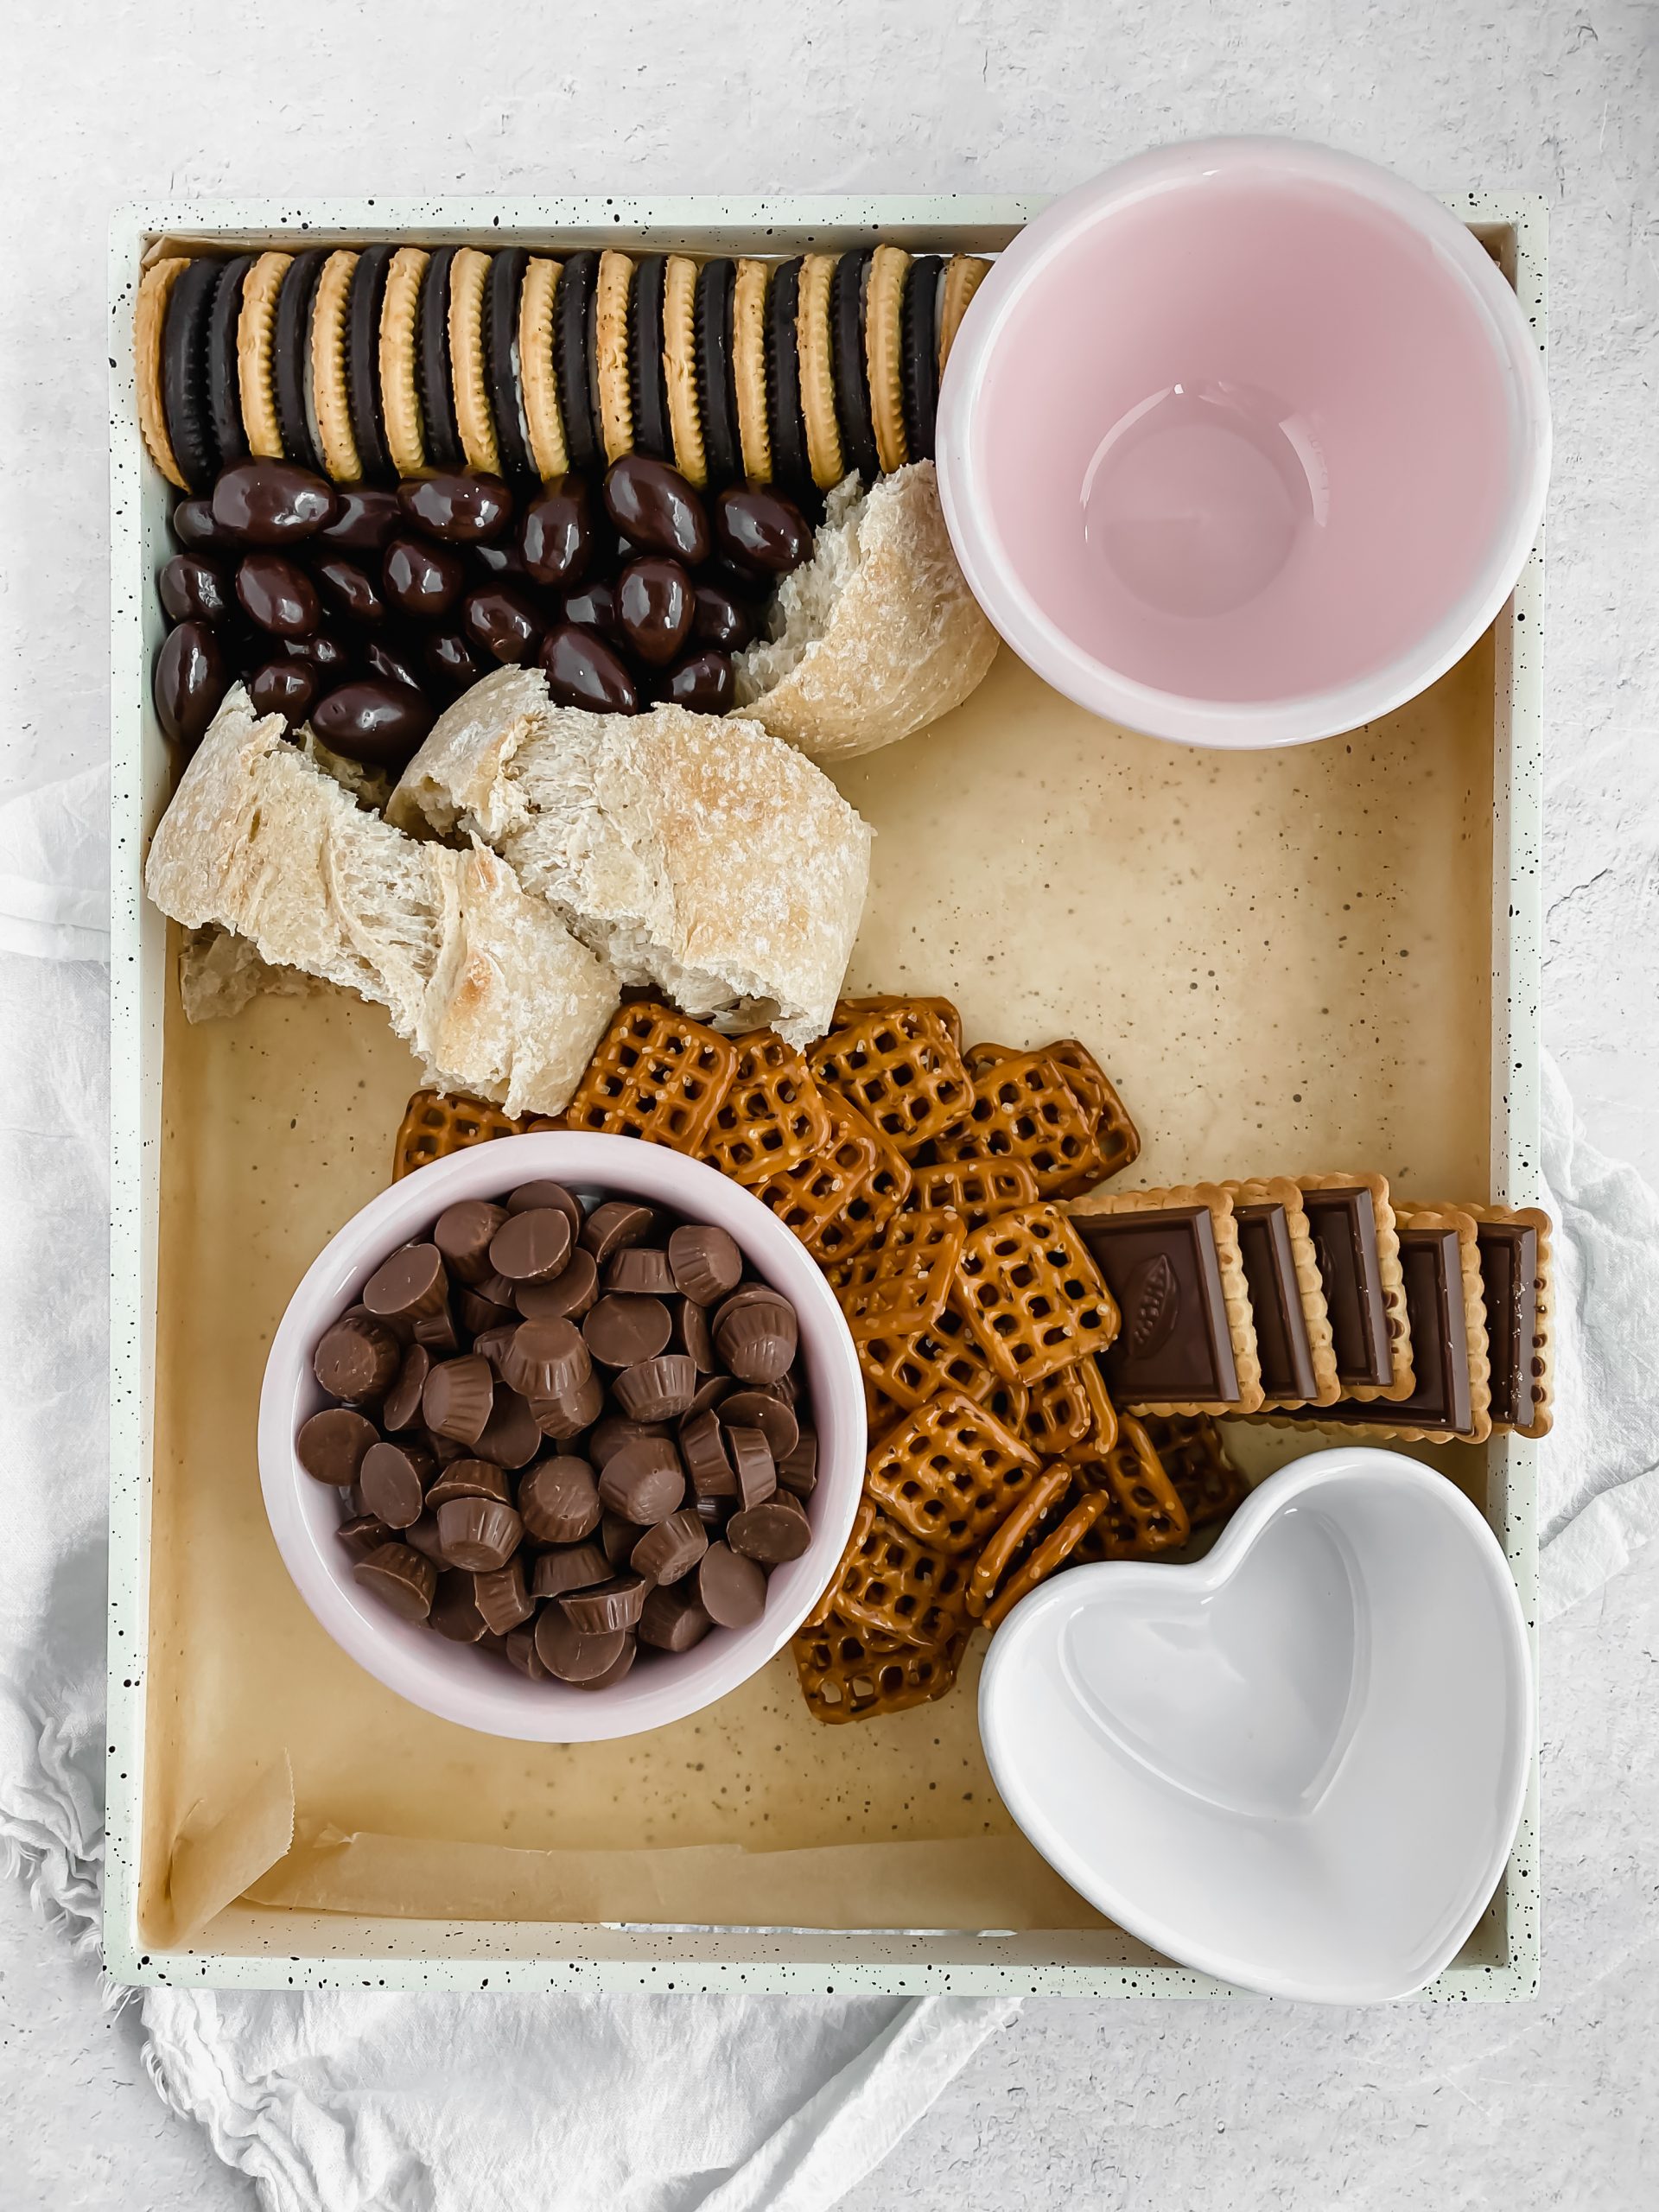
A few things I alway aim for is to make the board look full, intentional, and most importantly … YUMMY! Food is art so get creative and have fun with it! A few tips I do have for building a well placed board include:
- Use different sized bowls or different shapes even.
- Spread the most vibrant colored foods around the board to make it extra visually appealing and create contrast amongst the other foods/colors.
- Place similarly shaped foods apart from each other to create more texture and variety in the space.
- Fill the board up but don’t overcrowd things! Leave enough space for everything to “breathe” and make it easy to actually pick the food up from the spread.
Recipe FAQs
Definitely! This is a great recipe to make ahead of time before guests arrive. My only warning is that you ensure any juicy fruit/ingredients with moisture are not touching any crunchy or dry ingredients like crackers or bread. The juices may spread and you’ll end up with soggy crackers.
Whatever large tray of sorts that you have! If you have a big wood cutting board, that makes for a beautiful background. Any serving tray will do, though. Even a cookie sheet is a good option. I like to line with parchment for aesthetic purposes and for easy clean up. Something with edges is also nice if you plan to transfer your board from wherever you build it to where you’re serving.
A dessert charcuterie board is great for movie nights, bachelor nights, and game nights. Theyre also a fun option for baby showers or wedding showers. If you have a holiday party, a dessert charcuterie board is great to set out after dinner for people to graze as they wish. It’s also a great option for birthdays, graduations, first communions, etc.!
More Recipes You’ll Love
Love this recipe? Please leave a 5-star 🌟🌟🌟🌟🌟 rating and comment in the recipe card below. Thanks for visiting!
Chocolate Dessert Charcuterie Board
Equipment
- Marble or Wooden Slab / Board
- Knives
- Cheese knives
- strainer
Ingredients
- 3-4 different fruits: I used red grapes, strawberries, and raspberries to keep the colors vibrant but also similar. I think blueberries, pineapple, or grapefruit slices would also be delicious
- 2-3 cheeses: I try to pick up a variety of flavors at Kroger/Whole Foods cheese bar – they often have smaller wrapped cheeses for less than $5 as a ‘buy it and try it’ perfect for a board like this, you don’t want to get stuck with an $20 aged bleu cheese that you don’t like
- 6-8 desserts/snacks that have crunch: oreos, chocolate covered almonds, yogurt covered cranberries, pretzels, marshmallows, chocolate chips, fresh baguette
- Other suggestions: include jerky, meat sticks, or salami if you want an extra salty bite. You could do a ‘candy’ inspired board or stick with a classic
Instructions
- A few things I alway aim for is to make the board look full, intentional, and most importantly … YUMMY! Food is art so get creative and have fun with it! A few tips I do have for building a well placed board include:Use different sized bowls or different shapes even:
- Spread the most vibrant colored foods around the board to make it extra visually appealing and create contrast amongst the other foods/colors.
- Place similarly shaped foods apart from each other to create more texture and variety in the space.
- Fill the board up but don't overcrowd things! Leave enough space for everything to "breathe" and make it easy to actually pick the food up from the spread.
Chocolate on a platter – GENIUS! love this idea!
this board was MEANT for bachelor nights and I am a sucker for a fruit + chocolate combo. such a fun snack idea
Galentines night never looked so good! Great idea, APOP!